Wednesday, March 23, 2011

A Card fit for a Fairy Pirate

My lovely little baby turned 3 years old yesterday. The time has certainly flown by. When we started talking about her birthday a few months ago she told me she loved fairies and wanted a fairy cake. So I went with the fairy theme. Made the invites, had the cake all planned, then the silly little goose changed her mind and wanted to go with pirates. We went whole hog on the pirate theme when it came to her actual party, but she was out of luck when it came to her birthday card. I had a one track mind and that was for fairies.


I haven't done a mojo challenge for a while, so I thought I would do last week's sketch.


Seemed simple enough. A circle, a square and some ribbon. Not so simple. The fairy stamp I had in mind was huge in comparison to the dimensions of the actual card, so my sizing had to be a little off from the sketch, which was fine by me. I also had to change the orientation from the card to landscape in order to accomodate my Pink Cat Studios Enchanted Lily stamp


My daughter is not exactly the girliest of kids (you would never guess from the pirate request Ha). So I decided to go against her nature and make her a pink girly card (she'll probably hate me for this when she's a teenager). I thought since Lily was swinging from a tree and covered in flowery vines I would try to find a paper that had the same sort of theme. I managed to do just that, and it was pink to boot.

I also decided that since fairies aren't real (sorry to burst anyone's bubble out there) that I would make her a little whimsical and give her pink hair. I love the way her hair turned out. I'm also pretty impressed with myself and my colouring and shading of her dress. I added a little heart brad and tag with the make a wish on it just to make it a little more special for a birthday.
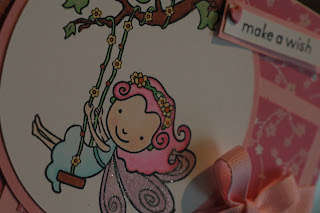

I'm pretty pleased overall with the way this turned out, considering I've been on a bit of a CAS kick lately and this card has a little bit more going on than a bunch of white space.

Stamps: PCS Enchanted Lily
Ink: Memento, Copics
Paper: Gina K, Recollections Itsy Bitsy Ditsy Cherry Pie
Other: Ribbon, Heart Brad.


Friday, March 18, 2011

Cupcakes Galore

I'm almost there in the birthday card making marathon. This is number 3 of 5 that I have to get done by the end of next week. This one is going to my friend who is turning 35 but whose husband dropped the ball and now she isn't getting the birthday that she expected.


I wanted to do something fun with this card. I wanted to use a colour that I don't use very often and I wanted to try something that I don't think that I have tried before. I also knew I was kind of limited once again by my birthday stamps, and that I was going to have to likely go with cupcakes again. So I decided to use a cute polka dotted paper that I recently purchased. I figured it kind of looked sort of kitsch, which is kind of what cupcakes are. So I went with it, and just found a matching red to add a bit more umph


Recently I had noticed a few cards online that had used layers of scalloped punched paper. I thought that it would be perfect for this card since the edges of the punch went with the polka dots, mimicking the shape. I originally thought about doing the entire card background in the punched papers but then decided to just go halfway. I also wanted something to break up the solid red and the polka dots (and to hide an edge) and I found this cute little gingham ribbon so I went with it.

I had a really hard time trying to decide what colours to make the cupcakes. In the end I went with orange, pink and blue. I thought about doing yellow and maybe a red icing, and doing brown cupcakes papers, but decided against it. Because the card was already kind of busy I didn't have much space to put the sentiment, so I made a little tag with a birthday wish.


Stamps: TSG Make a Wish
Paper: Recollections Small Red Dots, Canson Red, Gina K Pure Luxury White Cardstock
Ink: Memento, Copics
Other: Ribbon, Jewelled Brad

Thursday, March 17, 2011

Have your cake and eat it too !

2 birthday cards down, 2 to go (well in the next week anyway). I have yet to decide who is getting this one, its either a friend or my sister. Not sure which. Really depends maybe on how the other cards I make turn out.

So I had a few goals with this one. I usually make cupcake birthday cards, only because those are really the only stamps that I have that sort of relate to birthdays, unless I'm making something for a little kid. I finally purchased a new birthday set, and although it is heavily laced with cupcakes, I decided to use one of the cakes.

I also knew that I wanted to use embroidery thread and a button somehow as accents. And finally I wanted it to be sort of spring like since the first day of spring is this weekend, and everyone's birthdays coming up are all within a few days of this day, so I went with green.


I stuck with my simple is best thing that I've been going with the last little while. Decided to just do one simple cake image, and a simple greeting at the top of the card. I didn't want to use all kinds of elaborate papers. I had the cross hatched paper in a stash of scraps that I've been holding onto. I think its a Martha Stewart paper, but I can't be sure. I thought it lent itself to the understated look I was going for and well I had thread and a button that would match perfectly.

I decided to make the cake a little whimisical with the colour choices just to add a little pop to the card. I had initially coloured in where the pearls are located on the card, but it just didn't seem right, so I decided to go ahead and add another little 3D element to it.


Stamps: There She Goes Make a Wish
Ink: Memento, Copics


Wednesday, March 16, 2011

Happy Happy Birthday Children Dear.........

The birthday extragavanza continues. I have four birthdays to make cards for this week. Thought I would start off with what I thought would be the simplest card to make. My daughter has a little friend, who was born just three days before she was, and his birthday party is coming up this weekend. He's turning 3.

3 year olds don't need anything elaborate, so once again I've gone simple. I decided I didn't want to do any fancy schmancy designer paper, just wanted to use stamps and my copics. I also haven't used my SU stamp set All In The Family in about three years, so I decided to pull it out. This is the cute little design I came up with.


I thought it was perfect to just make a row of kids celebrating a kids birthday, so that is what I went with and of course this stamp set was perfect for it. The most difficult thing was lining up the stamps so that heads were on bodies and hats were on heads. You can see I had a little bit of an issue with some of them, but that's what you get with woodmounted stamps. You can't see where you are placing them.

I tried to make it as colourful as possible without going nuts. I think it worked out. I also decided the kids weren't enough so I added a little pop of colour with the ribbon. The one thing I think I maybe could have added was perhaps one of the kids holding a balloon. But I'm not going to go back and add that now.


The one thing I hope everytime I make a card for a kid is that the parents are like me and they save everything for their kids. I hope that sometime down the line this little boy will look back at his birthday cards a truly appreciate the time and effort (but he's a boy so he probably won't :P)
Stamps: SU All In The Family
Ink: Memento Tuxedo Black, Copics
Paper: Gina K Luxury White Cardstock

Thursday, March 10, 2011

A Heartfelt Thank You & Aloha

My kids attend a local preschool. The teachers at the school are absolutely fantastic. Unfortunately late last year just before Christmas, one of the teachers (who happens to teach both my kids) had an accident at the school and broke her leg. She required surgery on the broken leg and has since been recovering and going to physio to get herself back to what she used to be. We've all missed her.

In the meantime the school found a wonderful replacement for her. Miss Katie. We love Miss Katie. My kids love Miss Katie. She's a fantastic teacher and just seems to really bond with the kids. Well Miss Katie is leaving the school, as Miss Cathy has finished her rehab and will be returning to teach after March Break. We are all going to miss Miss Katie. So I thought it was only the right thing to do to make her a thank you card to say what a wonderful job she has done and how much my kids thank her for caring about them for the last several months and to say Aloha.


I have really come to appreciate simple cards. Not too much going on. I thought about doing a sketch this week, went and looked at Mojo and almost had a heart attack looking at how busy it was. So I opted to go my own route.

We love everything Hawaiian in our family so I decided to go with a hibiscus stamp that I recently purchased from Verve. And of course this gave me the opportunity to once again practice with and use my new copic markers. I also tried something else for the very first time on a card: I took my lazy butt up to my sewing room and sewed a small little frame around the card.

The one thing that I'm not happy about is the thank you stamp that I used. I have a gazillion stamps. You would think that in a gazillion stamps I would have a decent thank you stamp. Just a simple thank you. But this was the best I could come up with. Its a little small. Something bigger, but just as simple I think would have looked better. So note to self, buy a better thank you stamp


All in all I'm pretty happy with the way it turned out. I like the colours I used, I think its vibrant, but has maintained the simplicity I was going for. Hopefully Miss Katie will like it.

Stamps: Verve Hibiscus; SU Short and Sweet

Other: Copic Markers, Momento Black Tuxedo Ink

Wednesday, March 9, 2011

A Fairy Happy 3rd Birthday

At the end of the month my youngest daughter turns 3. So of course we are having a birthday party for the little monkey. We went back and forth on themes. She wanted fairies, then she wanted princesses, then tigers, then superheroes. I was all set to do the superhero thing, but couldn't find a superhero stamp. So I managed to convince her to go the fairy route.

As you may have read I'm the proud new owner of a bunch of new copics, so of course I decided why not this invite for the first try of the markers. I used a great Pink Cat Studio fairy stamp, and went to town colouring.

I also wanted to make sure that for keepsake purposes it was pretty evident which birthday this was for. So after digging through my stamps and trying out all kinds of flower and grass stamps I settled on an SU stamp from the Just Like You set. I added a little fairy dust and magically a little flowery 3 appeared :).

I'm not very good at shading (yet) but I will get better with practice. I also made a few mistakes and because when I started I didn't have a blender (they were on backorder) there wasn't much I could do to fix them. But I think it turned out okay for a first attempt


Oh and excuse the disgusting lighting on this picture. I have no idea what the heck was going on. I think my nice SLR is about to cack out.